Writing a Dockerfile for a Web App: A Step-by-Step Example for Beginners
G
GnurtFull-stack developer
12 min read
In this article
To make your web app run anywhere, you need to package it, and the Dockerfile is the file that tells Docker how to package it. In this article, you will write your first Dockerfile for a small web server written in Node.js (using Express), then build it into an Image and try running a Container from it on your machine. When the app starts, open your browser and go to localhost:3000 — you will see the greeting “Xin chào từ Docker!”.
Before you start, check whether Docker is already on your machine with this command in the Terminal:
docker --version
If the Terminal prints a line like this, Docker is already on your machine. The version number and build code on your machine will be different — the line only needs to start with Docker version:
Docker version 28.3.2, build 578ccf6
If the Terminal says it cannot find the docker command — on Windows, the error starts with ‘docker’ is not recognized as an internal or external command…; on macOS it is command not found: docker — install Docker by following Docker’s guide. But if docker --version works and another docker command fails to connect, Docker Desktop is not open yet — open Docker Desktop, wait until it finishes starting, and try the command again.
If creating an Image is like cooking a dish, the Dockerfile is the recipe: each line records one thing to do, and Docker works through them in order, from the first line to the last.
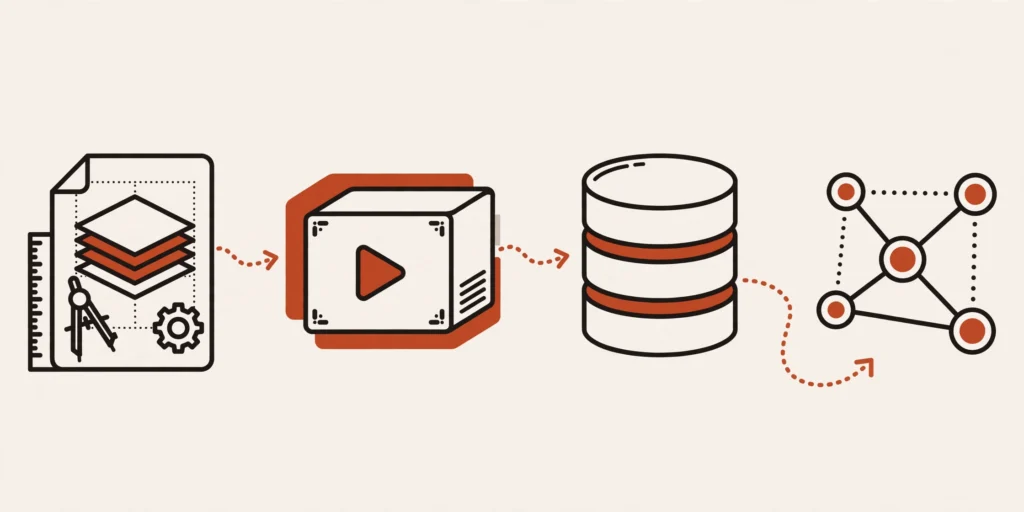
Whenever a step changes a file — copying a file in, or running a command that installs a package — Docker keeps the result of that step as a layer. The layers stack on top of each other, and the whole stack is the Image.
On the next build, Docker reuses the old result for any step that has not changed, instead of running everything from the start. Only when you change a step does Docker rerun from that step onward. That is why the order of the lines in the Dockerfile matters so much. Later, when you write the file, you will see how this decides where each line goes.
Instructions like RUN and COPY create the layers of the Image.
Writing a Dockerfile for a Web App
Now let’s start writing. The example app is very small, so you only need a few files.
What Files Does the Example App Have?
The example app has only two main files: package.json declares the app’s name and the packages it needs, and server.js runs a small web server. When you finish the whole article, your project folder will look like this:
In this article, you will create 4 files: package.json, server.js, Dockerfile, and .dockerignore. The .env and docker-compose.yml files in the tree belong to the Compose article — you do not need to touch them yet.
Creating the App’s Files
Create a new folder named my-app and open a terminal window inside that folder, because every file and every command in this article lives there:
mkdir my-app
cd my-app
How to open a terminal window right inside the my-app folder: on Windows, right-click an empty space in the folder and choose Open in Terminal; if you do not see that item, type cmd in the File Explorer address bar and press Enter. On macOS, right-click the my-app folder in Finder and choose New Terminal at Folder; if you do not see that item, turn it on in System Settings → Keyboard → Keyboard Shortcuts → Services, under Files and Folders, or open the Terminal and use the cd command to go to that folder.
From here on, every command in this article runs in the my-app folder, so each time you open a new terminal window, cd into my-app first, then type the command.
Create the files with a plain-text editor on your machine: Notepad on Windows, TextEdit on macOS (remember to switch to plain-text mode before you type: menu Format → Make Plain Text, or the shortcut Shift + Command + T), or VS Code if you already have it installed.
On Windows, when you save the Dockerfile, remember to save it as All files (or turn on showing file extensions in File Explorer to check). Otherwise your file will become Dockerfile.txt, and Docker does not accept a file with a .txt extension.
This file declares an app named web-app, which runs from the server.js file, and uses two packages: express to run the web server, and mysql2 to connect to MySQL.
Next is the server.js file:
const express = require("express");
const mysql = require("mysql2/promise");
const app = express();
app.get("/", async (req, res) => {
  if (!process.env.DB_HOST) {
    return res.send("Xin chào từ Docker!");
  }
  try {
    const conn = await mysql.createConnection({
      host: process.env.DB_HOST,
      user: process.env.DB_USER,
      password: process.env.DB_PASSWORD,
      database: process.env.DB_NAME,
    });
    const [rows] = await conn.query("SELECT NOW() AS now");
    await conn.end();
    res.send("Xin chào từ Docker! Giờ trên MySQL: " + rows[0].now);
  } catch (err) {
    res.status(500).send("Chưa kết nối được database: " + err.message);
  }
});
app.listen(3000, () => console.log("App chạy ở cổng 3000"));
An environment variable is a way to pass configuration into the app from outside, instead of writing it directly in the code. Here, the app checks the environment variables to see whether database information is available: if it is, the app connects to MySQL and returns the current time from the database; if not, it only returns the greeting. You do not need to understand every line of code. You only need to know that this file receives requests on port 3000 and reads its configuration from environment variables.
Writing the Dockerfile
Now for the main part. Create a file named Dockerfile (with no extension) in the same folder, with these 7 lines:
FROM node:26-alpine
WORKDIR /app
COPY package*.json ./
RUN npm install
COPY . .
EXPOSE 3000
CMD ["node", "server.js"]
FROM node:26-alpine: uses the base Image node:26-alpine — an Image that already has Node.js 26 installed — as the starting point for everything that follows.
WORKDIR /app: creates the /app folder inside the Image and sets it as the working folder, so the commands after it all run there.
COPY package*.json ./: copies package.json into the Image; the wildcard * also copies package-lock.json if that file exists.
RUN npm install: runs the command that installs the packages declared in package.json, right at build time, so when the build finishes, the Image already has everything the app needs.
COPY . .: copies the rest of the code into the Image.
EXPOSE 3000: notes that the app listens on port 3000. This is only a note — it does not open the port by itself. To open the port you have to use -p when you run the Container, as you will see later.
CMD ["node", "server.js"]: the command that runs every time the Container starts: it starts the app with Node.js and the server.js file.
Why not copy all the code at the start to keep it simple? Because of the layer mechanism above: the npm install step takes the most time, and it only depends on package.json. If you copy package.json separately first, then the next time you only change the code, Docker will reuse the result of the npm install step and only rerun from the COPY . . step onward. But if you copy all the code at the start, every time you change one line of code you have to wait for all the packages to install again.
The .dockerignore File
In the same my-app folder, next to the Dockerfile, you also need to create a .dockerignore file. This file lists the things Docker must not copy into the Image:
node_modules
npm-debug.log
.git
.env
At this point, there is no node_modules folder on your machine yet — it only appears if you run npm install there. But create the file now anyway. As soon as you run npm install on your machine, the node_modules folder (where the installed packages live) appears, and on the next build the COPY . . command would copy it into the Image too if there were no exclusion file. The same goes for the other two lines: npm-debug.log is the log file npm creates when it hits an error, and .git is the folder that stores the history of code changes. Neither of them needs to be in the Image. Without the .dockerignore file, COPY . . would copy the heavy node_modules folder into the Image, making the Image heavier and the build slower, without any benefit.
The .env file will hold the database password in the Compose article. A password must never be inside the Image. Docker Compose will read it from the .env file on your machine and pass it into the Container when it runs.
Building the Image and Running It
With the Dockerfile ready, let’s build it into an Image. Open a terminal window in the project folder (where the Dockerfile is) and run:
docker build -t web-app .
This command builds an Image from the Dockerfile in the current folder. The -t is short for --tag: you give the Image a name, here web-app; because you did not write a version number after the name, Docker labels it latest by default. The dot at the end means the current folder is the source for the build. While building, Docker prints each step in order and reports when a step is done; the first build can take a while because Docker has to download the base Image node:26-alpine to your machine. When the build finishes, Docker reports that it has created the Image named web-app.
Once the build is done, try running a Container from that Image:
docker run --rm --init -p 3000:3000 --name web web-app
--rm: deletes the Container by itself after it stops, so the next run does not fail because the name is already taken.
--init: asks Docker to insert a small init program (tini) as the first process in the Container. With it, a stop signal like Ctrl+C reaches the app, and finished child processes get cleaned up.
-p 3000:3000: maps port 3000 on your machine to port 3000 in the Container. The first number is the port on your machine, the second is the port in the Container.
--name web: names the Container web.
web-app: the name of the Image to run — the Image you just built.
While the app is running, this terminal window stays busy — you cannot type another command in it. To type another command, open a second terminal window.
Now open your browser and go to localhost:3000 — you will see the words “Xin chào từ Docker!”.
The app only shows the greeting, because you have not set any environment variables for it, so the part of the code that connects to MySQL does not run. That part will run in the Compose article, when the environment variables are all set.
To stop the app, just press Ctrl+C in the terminal window that is running the app, or open another terminal window and run docker stop web. The web here is the name you set with --name web in the run command. If you forget the Container’s name, run docker ps to see the names and IDs of the running Containers. You can also stop a Container by its ID instead of its name, for example docker stop <ID>. The docker stop command does not need to run in the my-app folder; only the build and run commands need to run in the project folder.
Common Errors When You First Write a Dockerfile
If you follow the steps above, you may run into these three errors. Each fix is short — just match what you see and follow the steps.
You forgot to create .dockerignore. Docker copies node_modules and the extra files into the Image, making the Image heavy and the build slow. Create the .dockerignore file with exactly the 4 lines above, then build again.
The COPY command has a wrong path. Docker reports an error, usually with the words COPY failed and the name of the file it cannot find. Check the path in the COPY command again, and make sure you are running the command in the right project folder, where the Dockerfile is.
Port 3000 is already used by another program. When you run it, Docker reports an error and the Container does not start. The error will contain Bind for 0.0.0.0:3000 failed: port is already allocated or bind: address already in use. Both mean that port 3000 on your machine is already used by another program. The quickest fix is to switch to another port: change the first number in -p 3000:3000 to 3001:3000 (port 3001 on your machine points to port 3000 in the Container), run the command again, then open your browser at localhost:3001 instead of localhost:3000. If you know which program is using the port, you can also stop that program.
Frequently Asked Questions
Is a Dockerfile an Image?
No. A Dockerfile is a text file that records the instructions; an Image is what Docker creates after following each instruction in that file.
Conclusion
By the end of this article, you have your first Dockerfile, an Image named web-app, and a Container running that app on your machine.
The next article in this series will use this same app and Dockerfile to run the app and MySQL together with Docker Compose, keeping the data in a Volume so it is not lost when the Container stops. Next up: Docker Compose for a Web App with a Database.
Bạn có thể sử dụng tài khoản Google để bình luận. Google chỉ chia sẻ tên và địa chỉ email đã xác minh để hiển thị tên của bạn. Bạn có thể đăng xuất bất cứ lúc nào.
In the previous article, you wrote a Dockerfile for a small web app, built it into an Image, and ran a Container. This article uses that same app and Dockerfile to run the app and MySQL together with Docker Compose, in a single command (docker compose up). Make sure Docker is installed — if it...
When working with Docker, you will frequently use four core concepts: Image, Container, Volume, and Network. Simply put, an image is the blueprint, and a container is the image running. A volume keeps data, while a network connects containers to each other. These four concepts follow an order: first the blueprint, then the running copy...
What is Docker? Docker is an open platform that helps you package, ship, and run an app. An app runs in a separate environment called a container. In short, Docker helps an app run the same way on many different machines. Everything the app needs is packaged together. What Is Docker? According to Docker’s official...







Bình luận
Bạn có thể sử dụng tài khoản Google để bình luận. Google chỉ chia sẻ tên và địa chỉ email đã xác minh để hiển thị tên của bạn. Bạn có thể đăng xuất bất cứ lúc nào.
Đăng nhập bằng GoogleChưa có bình luận nào. Hãy là người đầu tiên!