What Is Tailscale? How to Install and Connect Devices for Beginners
AG
Assistant GnurtFull-stack developer
5 min read
In this article
Picture this: your laptop is at home, your phone is with you, and a server sits somewhere else. To open the server’s admin page from outside, you usually have to open a port on your router — which means configuring the router and leaving that port exposed to the internet. Tailscale skips that step: it connects these devices into one private network, and once it’s set up, you reach them as if you were on the same local network. This article shows you how to install Tailscale, sign in, and check the connection.
What Is Tailscale?
Tailscale is software that creates a private network (a VPN) connecting your devices to each other. That private network is called a tailnet: when your laptop, phone, and server all join one tailnet, they connect to each other as if they were on the same local network. Each device gets an IPv4 address in the 100.x.y.z range, which stays the same when you switch from Wi-Fi to 4G. In this article, I mostly use IPv4 addresses and device names because they are the two easiest ways to work with.
Tailscale encrypts your data before sending it between devices, so nobody else can read what passes between them. When two computers can connect directly, data goes straight from one to the other; if they can’t, Tailscale relays it through one of its own servers — but the data stays encrypted. You can also use device names to connect instead of remembering IP addresses; this is turned on by default for new private networks.
What Is a Tailnet?
A tailnet is your private network on Tailscale: all the devices signed in with the same account belong to it, and each account has exactly one tailnet. You manage your tailnet from the Tailscale admin console: view the device list, approve new devices, and remove ones you no longer use.
Installing and Signing In for the First Time
You install Tailscale on each device you want to connect, then sign in with the same account so the devices automatically join one tailnet. Tailscale lets you sign in with Google, Microsoft, GitHub, or Apple — you don’t need to create a separate password.
On Windows and macOS
Step 1: Download the installer from the Tailscale download page and install it as usual. On a Mac, you can also get Tailscale from the App Store.
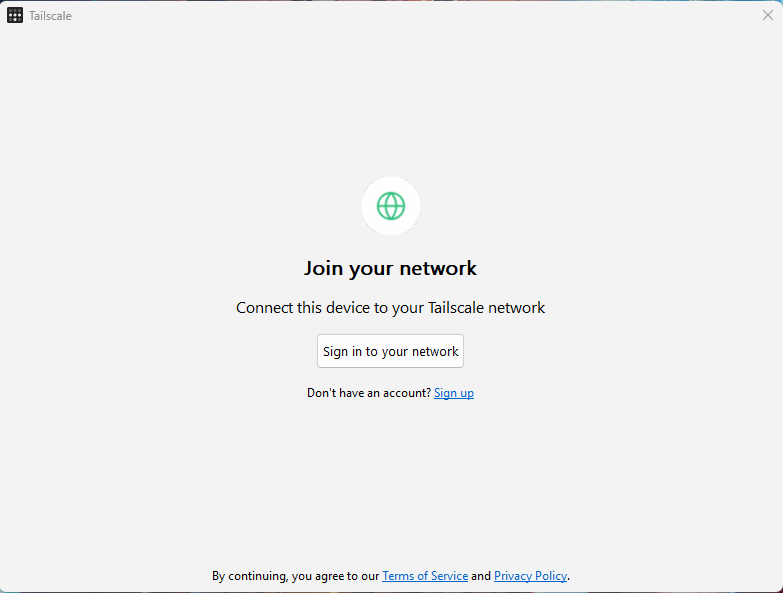
Step 2: Open the app — the welcome window appears.
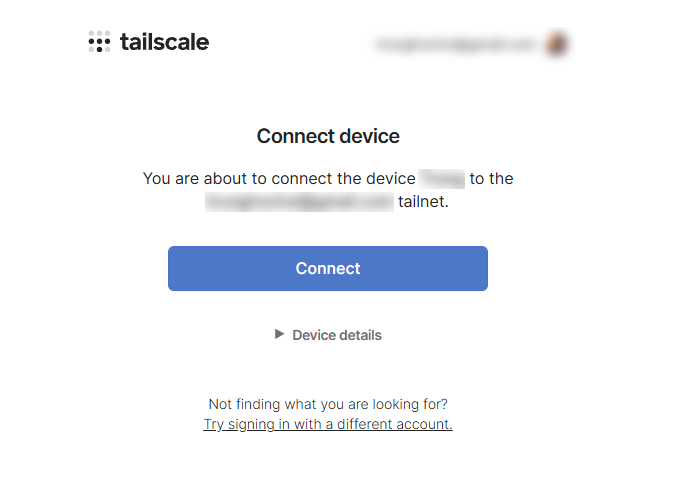
Step 3: Click Sign in to your network. Your browser opens — sign in with your account, then click Connect on the confirmation page to add the computer to your tailnet.
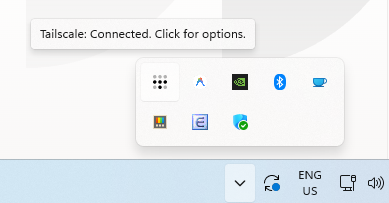
Step 4: Once connected, the Tailscale icon in the system tray (Windows) or the menu bar (Mac) shows Connected.
Or install from the command line — use PowerShell on Windows, Terminal on macOS:
winget install Tailscale.Tailscale
brew install --cask tailscale
winget is the package manager built into Windows (Tailscale.Tailscale is the package name); brew is the equivalent on macOS. Check the version with:
tailscale version
On Ubuntu
Step 1: On Ubuntu, install Tailscale from the Terminal with this command:
curl -fsSL https://tailscale.com/install.sh | sh
This command downloads a script from the internet and runs it right away, so only use Tailscale’s official address.
Step 2: Check the version with:
tailscale version
Step 3: Join the tailnet with:
sudo tailscale up
The Terminal shows an authentication link, for example:
To authenticate, visit:
https://login.tailscale.com/a/xxxxxxxxxxxxxxxxxxxx
Step 4: Open that link in your browser, sign in, and complete authentication — the Ubuntu computer will join your tailnet.
On iPhone and Android
Note: you only need to install Tailscale on the new device and sign in with the same account you used on your first computer — the devices will automatically share one tailnet, with no need to create a new account or a new network. The Machines section of the admin console lists your devices, each with its own IP address in the 100.x.y.z range.
Install the Tailscale app from the App Store or Google Play, then sign in with the same account you used on your computer. When the app asks to add a VPN configuration, allow it. Once that’s done, your phone appears in your tailnet’s device list.
Checking That Everything Is Connected
Open Terminal (macOS/Ubuntu) or PowerShell (Windows) and run:
tailscale status
Example output:
100.100.100.1 laptop ban@example.com linux -
100.100.100.2 phone ban@example.com android active; direct 203.0.113.10:41641
100.100.100.3 server ban@example.com linux active; relay "fra"
Each line shows the IP address, device name, account, operating system, and status. The status at the end of the line:
-: no traffic recorded yet (not necessarily an error)
idle: still connected, but no traffic
active; direct: sending directly
active; relay "fra": going through a relay in Frankfurt
See your current computer’s IPv4 address with tailscale ip -4 — example output:
100.100.100.1
Try pinging by IP address or by device name:
tailscale ping 100.100.100.3
tailscale ping phone
Replace phone with the real name from your tailscale status output. If pinging by IP works but the name doesn’t, the problem is name resolution through MagicDNS. A successful result looks like this:
pong from phone (100.100.100.2) via 203.0.113.10:41641 in 24ms
pong from phone (100.100.100.2) via DERP(fra) in 60ms
pong means the destination computer replied. via shows the route: an IP address with a port means direct, DERP(fra) means via the Frankfurt relay; the number at the end of the line is the latency (in milliseconds). If the destination computer is off, the command reports that it can’t connect — turn the computer on and try again.
Once your devices are on the same tailnet and respond to tailscale ping, the basic setup is done. Next up: using Tailscale safely — approving devices, auth keys, and exit nodes.
Bạn có thể sử dụng tài khoản Google để bình luận. Google chỉ chia sẻ tên và địa chỉ email đã xác minh để hiển thị tên của bạn. Bạn có thể đăng xuất bất cứ lúc nào.
Vietnam's Artificial Intelligence Law 2025 manages AI across 3 risk levels and requires labeling of AI content. Key points and a compliance checklist for businesses.
This article is a quick reference for the Docker commands beginners use most, with the commands grouped by task and shown with real examples. You’ll learn which command to use when, how to check things and clean up, and how to fix common errors. It sticks to the basic commands beginners usually need, and doesn’t...






Bình luận
Bạn có thể sử dụng tài khoản Google để bình luận. Google chỉ chia sẻ tên và địa chỉ email đã xác minh để hiển thị tên của bạn. Bạn có thể đăng xuất bất cứ lúc nào.
Đăng nhập bằng GoogleChưa có bình luận nào. Hãy là người đầu tiên!